SATO Online Services: A Virtual Customer Engineer, Right on Site
SATO Online Services: A Virtual Customer Engineer, Right on Site
For Internet Explorer *based on Ver. 10
1. Turn off proxy settings.
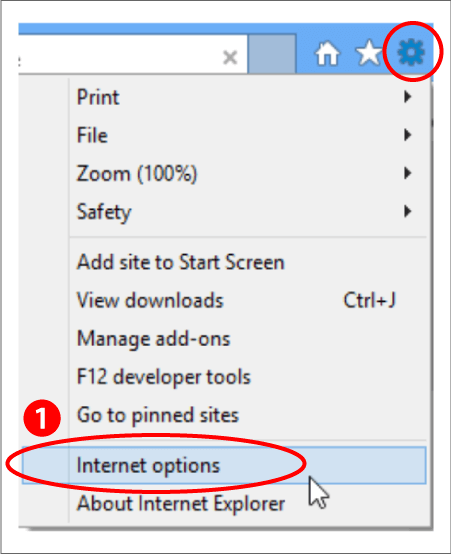
(1) Click the Tools button on the upper right corner of the browser window, and select "Internet options".
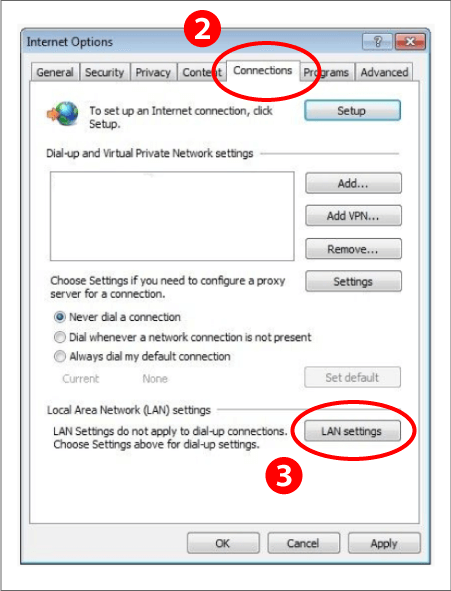
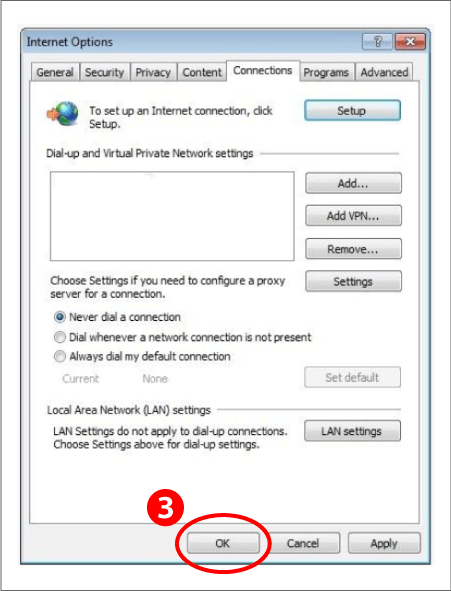
(2) At the Internet Options window that appears, select the Connections tab.
(3) Click LAN settings.
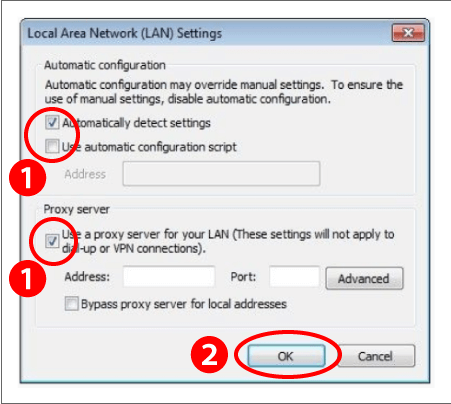
(4) The Local Area Network (LAN) Settings dialog box appears.
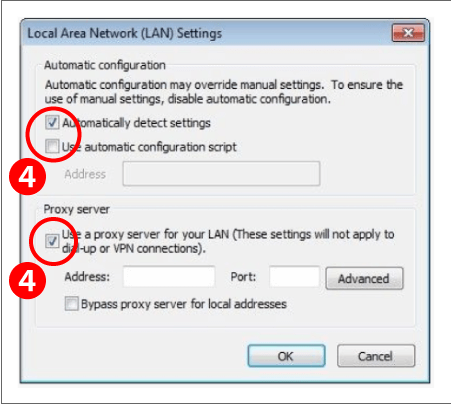
When Enabled:
The check box in the Automatic configuration and Proxy Server section will be selected.
See "3. How to change proxy settings" below to disable the proxy.
When Disabled:
The check box in the Automatic configuration and Proxy Server section will be cleared.
No setting changes are required.
*May not apply to networks that connect through proxy servers without using the computer's system settings.
2. How to change proxy settings
At the Local Area Network (LAN) Settings dialog box,
(1) Clear the check box in the Automatic configuration and Proxy Server section.
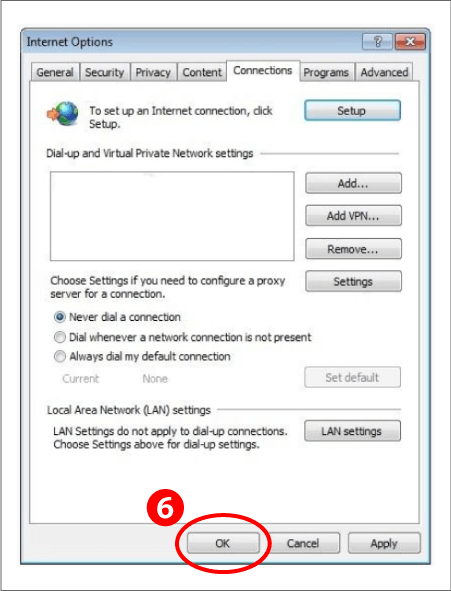
(2) Click OK to close the dialog box.
(3) Click OK to close the Internet Options window and complete changes.
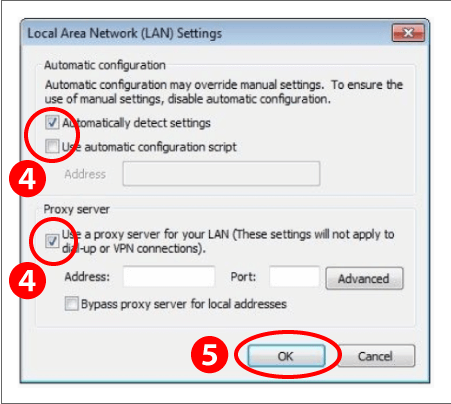
★When the scan is complete, ensure you restore the original proxy settings.
*Keep a note of the original settings as they may not be saved after you change them.
(4) Open the Local Area Network (LAN) Settings dialog box, and select the check box in the Automatic configuration and Proxy Server section.
*If the previous proxy settings are not saved, click the Advanced button to enter them manually.
(5) Click OK to close the dialog box.
(6) Click OK to close the Internet Options window.

For Google Chrome (Win) *based on Ver. 50
1.Turn off proxy settings.
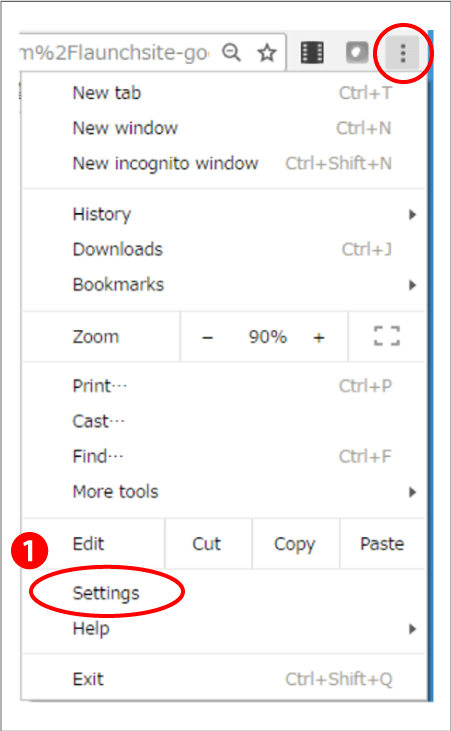
(1) Click on the menu button on the upper right corner of the browser window, and select Settings.
(2) At the Settings page that appears, scroll down and click "Show advanced settings".

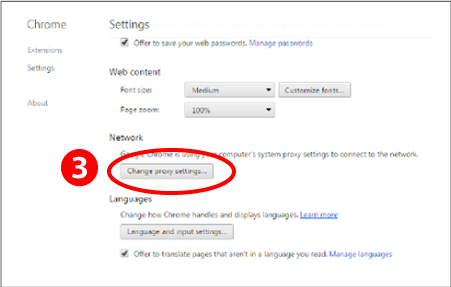
(3) Under the Network section, click "Change proxy settings".
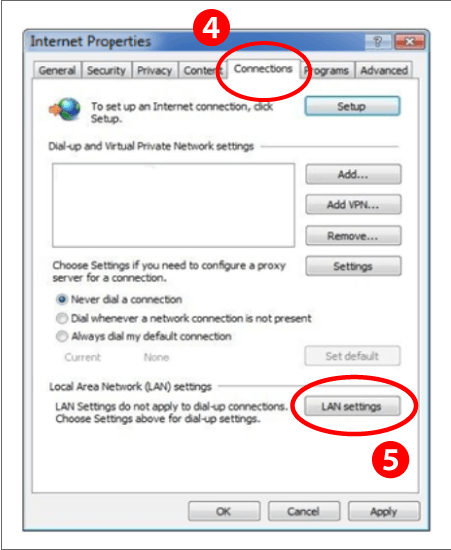
(4) At the Internet Properties window that appears, select the Connections tab.
(5) Click LAN Settings.
(6) The Local Area Network (LAN) Settings dialog box appears.
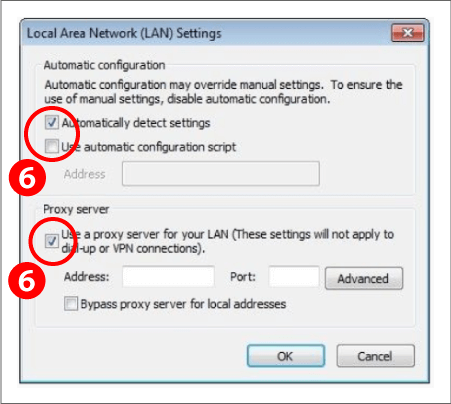
When Enabled:
The check box in the Automatic configuration and Proxy Server section will be selected.
See "3. How to change proxy settings" below to disable the proxy.
When Disabled:
The check box in the Automatic configuration and Proxy Server section will be cleared.
No setting changes are required.
*May not apply to networks that connect through proxy servers without using the computer's system settings.
2. How to change proxy settings
At the Local Area Network (LAN) Settings dialog box,
(1) Clear the check box in the Automatic configuration and Proxy Server section.
(2) Click OK to close the dialog box.

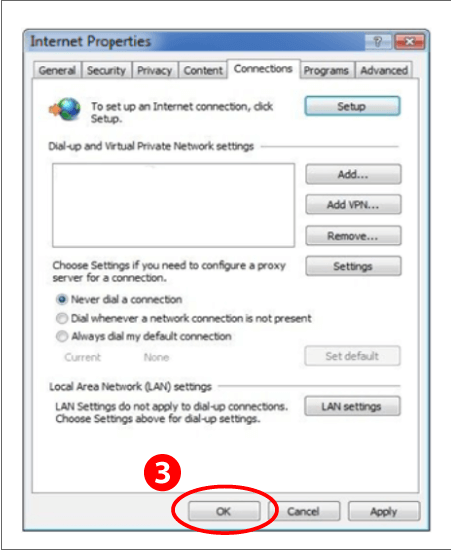
(3) Click OK to close the Internet Properties window and complete changes.
★When the scan is complete, ensure you restore the original proxy settings.
*Keep a note of the original settings as they may not be saved after you change them.
(4) Open the Local Area Network (LAN) Settings dialog box, and select the check box in the Automatic configuration and Proxy Server section.
*If the previous proxy settings are not saved, click the Advanced button to enter them manually.
(5) Click OK to close the dialog box.

(6) Click OK to close the Internet Properties window.